Key takeaways
- The best egg incubators for hatching chickens are the Brinsea Ovation 28 EX for precise, low-intervention hatching, the Nurture Right 360 for most small flocks, and the Brinsea Maxi II Advance for a compact, easy-to-clean upgrade over entry-level still-air models.…
The best egg incubators for hatching chickens are the Brinsea Ovation 28 EX for precise, low-intervention hatching, the Nurture Right 360 for most small flocks, and the Brinsea Maxi II Advance for a compact, easy-to-clean upgrade over entry-level still-air models.
Our top picks


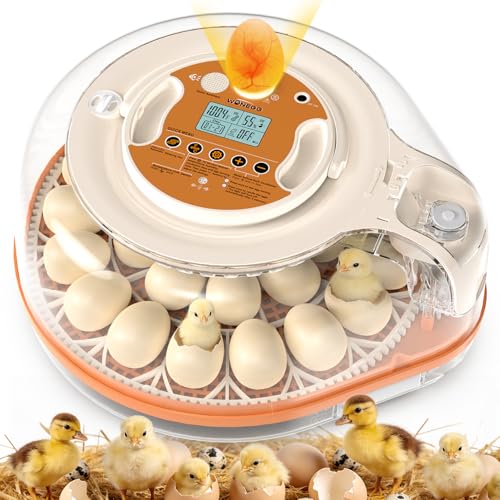

As an Amazon Associate we earn from qualifying purchases at no extra cost to you. Ratings are shown as listed on Amazon.
Quick comparison
| Incubator | Chicken-egg capacity | Temperature control | Humidity control | Turning system | Best suited to |
|---|---|---|---|---|---|
| Brinsea Ovation 28 EX | 28 | Digital proportional control, factory-set in Celsius or Fahrenheit | Automatic humidity pump with displayed relative humidity | Automatic cradle turning | Frequent use and maximum hatch-management control |
| Nurture Right 360 | 22 | Digital control with circulated air | External-fill water reservoirs; humidity displayed on the control panel | Automatic 360-degree rolling turner | Beginners and small backyard flocks |
| Brinsea Maxi II Advance | 14 | Digital proportional control | Manual water addition with humidity monitoring | Automatic cradle turning | Small batches and limited counter space |
| Farm Innovators Model 4250 | 41 | Digital circulated-air control | Manual water channels; humidity depends on room conditions | Automatic turning system | Higher capacity on a tighter budget |
Capacities are approximate chicken-egg capacities rather than maximum quail or bantam figures. Egg size, the chosen turning cradle, and whether you reserve space for a separate hatching area can reduce the usable number.
Our picks by situation
Best for most backyard keepers: Nurture Right 360
The Nurture Right 360 is a practical middle ground: its 22-egg capacity is large enough for a useful hatch but not so large that a failed setting becomes expensive. The clear lid and circular layout make it easy to see eggs without repeatedly opening the incubator. Its 360-degree rolling system turns eggs without requiring individual egg cups to be repositioned.
The external-fill reservoirs are particularly helpful during incubation because adding water does not require lifting the lid. That reduces temperature and humidity swings. Its main limitation is that humidity is still influenced by room temperature, ventilation, and how much water is exposed. The built-in readout is useful, but a second calibrated hygrometer is sensible when hatch results matter.
Best for precise humidity management: Brinsea Ovation 28 EX
The Ovation 28 EX is the stronger choice when you hatch several times a year or want more repeatable control over the final three days. Its automatic humidity pump lets you set a target rather than manually adding water and guessing how quickly it will evaporate. The separate humidity display, circulated airflow, automatic turning, and broad viewing area make it easier to manage a batch without opening the lid.
This sophistication comes with more parts to maintain. The pump, tubing, water reservoir, and humidity sensor all need clean water and periodic inspection. It is also typically more expensive than basic incubators, with premium models commonly falling in the roughly $300–$500 market range depending on configuration and region.
Best compact option: Brinsea Maxi II Advance
For a household setting only 14 eggs at a time, the Maxi II Advance avoids paying for unused capacity. Its compact footprint is easier to place away from drafts, direct sunlight, heating vents, and curious pets. Automatic cradle turning removes one of the most commonly forgotten daily tasks, while the clear top allows frequent visual checks.
It does not provide the same automatic humidity adjustment as the EX model. You add water manually and monitor the result, so it rewards a keeper who is willing to record readings and make small adjustments. Its smaller interior is also less forgiving if you want to hatch multiple breeds or stagger batches.
Best capacity on a budget: Farm Innovators Model 4250
The Model 4250 is designed for a substantially larger batch, with room for about 41 chicken eggs. That can reduce the cost per egg when many chicks are required, but capacity alone does not make hatch management easier. Manual humidity channels require you to understand how water surface area, room humidity, and ventilation interact.
This type of incubator is a reasonable choice for an experienced keeper who already owns a reliable hygrometer. For a first hatch, the larger batch can increase losses if temperature is miscalibrated or the turning system is incorrectly installed. Budget models also tend to expose more internal surfaces to dust, fluff, and spilled water, increasing cleanup time.
What matters more than the headline capacity
Temperature stability and air circulation
A circulated-air incubator uses a fan to reduce hot and cool zones. That is especially important in a larger cabinet, where an egg near the heater may experience different conditions from one at the opposite side. Digital temperature control is useful, but the displayed number is not automatically accurate. Before setting eggs, run the incubator empty for at least several hours and compare its display with a separate thermometer placed at egg height.
Do not compensate rapidly for every small fluctuation. Opening the lid, moving the sensor, or changing the thermostat repeatedly can create larger swings than the original error. A stable room—ideally away from drafts and major temperature changes—helps every model perform better.
Humidity control
Manual water channels are not inherently inferior, but they require observation. The same channel can produce different humidity in a dry winter room and a damp summer room. Automatic humidity systems cost more and add components, but they reduce the need to open the lid and make the lockdown period easier to manage.
A useful approach is to choose an incubator with a visible humidity reading, then verify it with a separate hygrometer before the first serious hatch. During the final three days, avoid unnecessary opening: humidity can fall quickly, and the developing chicks need consistent conditions while they pip and hatch.
Turning design
Automatic turning is worthwhile for most keepers. A rolling cradle, such as the one used by the Nurture Right 360, turns the eggs gradually around their circumference. A tilting cradle changes the angle of the entire egg tray. Both approaches can work when the eggs are correctly supported.
Check that the mechanism can be switched off for lockdown and that it stops in the manufacturer’s recommended position. Turning rails and small plastic gears are among the parts most likely to wear first, particularly when a tray is overloaded or an egg breaks inside the mechanism.
Visibility versus cleaning
Large clear lids make it easier to see pipping and identify an egg that has cracked, but transparency does not replace cleaning. A design with a removable tray, washable floor, and few narrow channels is usually easier to own than one with decorative recesses and inaccessible fan areas.
Decision matrix
| Your situation | Recommended type | Why | Trade-off |
|---|---|---|---|
| First hatch, 6–12 eggs | Compact automatic-turning model | Lower batch cost and simpler learning curve | Less room for mistakes and fewer spare parts |
| Regular backyard hatching | 22–28 egg circulated-air model | Good balance of capacity, visibility, and control | Higher purchase price than basic foam models |
| Dry climate or frequent travel | Automatic humidity model | Less manual water adjustment and fewer lid openings | Pump and tubing require maintenance |
| Many eggs per season | 35–50 egg cabinet or large tabletop model | Lower equipment cost per egg at full capacity | More cleaning, space, and consequences from a control error |
| Very limited counter space | 14-egg compact model | Fits more easily in a stable indoor location | Cannot combine many breeds or stagger batches easily |
Setup and maintenance that improve hatch management
- Choose the location first. Use a stable indoor surface away from windows, vents, and direct sun. A room that changes temperature by several degrees each day makes humidity and thermostat control harder.
- Run the incubator empty. Allow it to stabilize, then compare the built-in temperature and humidity readings with independent instruments. This identifies calibration problems before eggs are involved.
- Set clean, suitable eggs. Avoid heavily soiled eggs; aggressive washing can remove the natural protective coating. Do not set cracked eggs.
- Record the settings. Note temperature, humidity, water additions, turning status, and any alarms. Records make it possible to distinguish an equipment problem from a room-condition problem.
- Prepare for lockdown. Stop turning at the manufacturer’s specified time, fill the correct humidity reservoir, and avoid opening the lid unless necessary. Removing chicks too quickly or repeatedly opening the lid can disturb eggs that are still hatching.
- Clean after every hatch. Disconnect power, remove shells and fluff, wash removable parts with mild detergent, and disinfect only with a product approved for incubator use and diluted according to its label. Let every part dry fully before storage.
Ownership costs and common failure points
The purchase price is only part of the cost. A realistic budget includes an independent thermometer-hygrometer, disinfectant, replacement water tubing or pump parts on advanced models, and electricity. For example, a 60-watt incubator running continuously for 21 days uses about 30.2 kilowatt-hours: 0.06 kilowatts × 504 hours. At $0.20 per kilowatt-hour, that is approximately $6 in electricity, before heating losses and local rates.
Fans collect dust, turning mechanisms accumulate shell fragments, and humidity pumps can clog if mineral-rich water is used. Follow the manufacturer’s water guidance; filtered or distilled water may reduce deposits where permitted. Never immerse electrical components, and do not seal ventilation openings to force a humidity reading higher. Poor ventilation can create a more serious problem than a modestly low reading.
Bottom line
Choose the Nurture Right 360 if you want the easiest balance of capacity, visibility, and automatic turning. Choose the Brinsea Ovation 28 EX if repeatable humidity control and frequent use justify a premium price. Choose the Brinsea Maxi II Advance for compact batches, or the Farm Innovators Model 4250 when capacity matters more than automation. Whichever model you select, a stable room, verified readings, careful lockdown, and thorough post-hatch cleaning will influence results as much as the brand name.