Monitor calibration guide advice is often buried in jargon, when the goal is simple: color you can trust. This monitor calibration guide explains the numbers that define accuracy, the tools that measure it, and the steps to calibrate any screen for consistent, reliable results on screen and in print.
As an Amazon Associate we earn from qualifying purchases.
Our top picks


As an Amazon Associate we earn from qualifying purchases at no extra cost to you.
By Daniel Foster
Understanding Color Accuracy
Before buying tools, learn what accurate color actually means and how it is measured. Getting these fundamentals clear makes the process straightforward, because you will know what to target and how to tell whether a calibration has genuinely improved your screen.
| Term | What it measures | Target |
|---|---|---|
| Delta E | Color accuracy vs reference | Average below 2 |
| Gamut coverage | Range of colors shown | sRGB, DCI-P3, AdobeRGB |
| White point | Color temperature of white | 6500K (D65) typical |
| Gamma | Brightness curve | 2.2 standard |
The decision numbers: Delta E, gamut and white point
The core of any monitor calibration guide is a few figures. Delta E measures how far colors stray from a reference, with an average below two meaning differences are hard to see, while gamut coverage tells you the range of colors your screen can display.
White point and gamma round out the targets. A 6500K white point (D65) is the standard neutral reference, and a gamma of 2.2 sets a balanced brightness curve, so calibration aims to bring all of these in line rather than chasing one number alone.
Match the gamut to your work. sRGB suits web and general use, DCI-P3 targets video, and AdobeRGB matters for print, so calibrate within the space you actually deliver to, since accuracy in the wrong gamut does not help your finished output look right.
Hardware versus software calibration
There are two ways to calibrate, and they differ in accuracy. Software calibration adjusts the graphics card’s output using a colorimeter, which improves most screens, while hardware calibration writes directly to the monitor’s internal lookup table for greater precision.
Software calibration works on almost any monitor and is the practical choice for most users. It measures the screen and builds a correction profile, meaningfully improving accuracy even on panels not designed for calibration, at a modest cost for the colorimeter.
Hardware calibration needs a compatible monitor, such as professional BenQ, Eizo or ASUS ProArt models, but adjusts the panel itself for the most reliable results. For print and color-critical work, that precision and consistency over time justify the higher-end screen.
Space and fit: lighting and viewing setup
Calibration only holds if your viewing conditions are controlled. Ambient light shifts how color looks, so calibrate and work in consistent, moderate lighting rather than bright sunlight, and avoid colored walls or lamps that cast a tint across the screen.
Position the screen to reduce glare and reflections, which distort perceived color. A matte finish helps, and some professionals use a shading hood, so set up the panel where light is steady and place the colorimeter flat against the screen during measurement.
Tools and Steps to Calibrate
With the targets clear, the last part of this monitor calibration guide covers the gear and the process. The picks and steps below let you move from an uncalibrated screen to trustworthy, repeatable color without guesswork or expensive trial and error.
Colorimeter picks: Calibrite and Datacolor
A colorimeter is the essential tool, and the Calibrite ColorChecker Display is a popular, accurate choice with software that walks you through the process. It suits photographers, designers and video editors who need dependable results without a steep learning curve.
The Datacolor Spyder X2 is the main alternative, offering similar accuracy with its own guided software and ambient-light measurement. Both measure the screen and build a correction profile, so choose based on software preference and price, since either delivers a reliable calibration.
Hardware-calibration monitors worth considering
If you need the highest precision, a monitor with hardware calibration is worth the investment. Professional panels from BenQ, Eizo and ASUS ProArt let a colorimeter write directly to the display, holding accuracy over time better than software profiles alone.
These screens cost more and suit print and color-critical professionals rather than casual users. For a designer or photographer whose output must match across screen and print, though, pairing such a panel with a colorimeter is the most reliable long-term setup.
The calibration process step by step
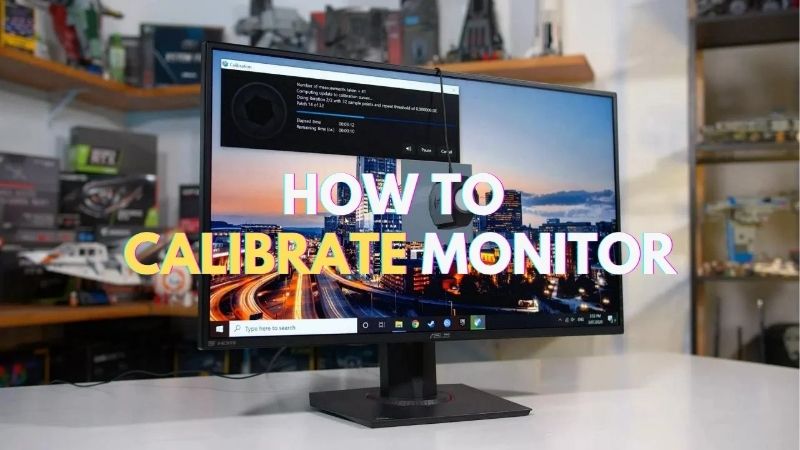
Start by letting the monitor warm up for around thirty minutes and setting it to its native or a suitable preset. Then launch the colorimeter software, choose your targets for white point, brightness and gamma, and follow the guided measurement with the device on screen.
The software then builds a profile your system applies automatically. Re-calibrate periodically, since panels drift over time, and keep your lighting consistent, so the profile stays valid, which is the quiet discipline that separates a one-off calibration from lasting accuracy.
Common calibration mistakes to avoid
The most common mistake in any monitor calibration guide is skipping the warm-up, since a cold panel reads differently than one that has stabilized. Give the screen around thirty minutes before measuring, or your profile will be based on colors that shift as it heats up.
Another pitfall is calibrating under changing light. If sunlight moves across the room or a colored lamp casts a tint, the results will not match your working conditions, so calibrate in the steady, moderate lighting you actually work in day to day.
Finally, do not set brightness too high. An overly bright screen skews perceived color and tires your eyes, so target a sensible luminance for your room during calibration, which keeps both the profile accurate and your long sessions comfortable.
Frequently Asked Questions
Here are quick answers to the questions readers ask most about calibration, so you can start with confidence.
Do I really need to calibrate my monitor?
For color-critical work like photo, design or video, yes, since accurate color ensures your output matches what others see. For casual use, calibration is optional but still improves the image, so weigh the benefit against the cost of a colorimeter for your needs.
What Delta E should I aim for?
Aim for an average Delta E below two, where color differences become hard to perceive. Many creator panels reach this after calibration, so a colorimeter and a guided profile can bring most screens close to that target for trustworthy, accurate color.
Is software calibration good enough?
For most users, yes. Software calibration with a colorimeter meaningfully improves almost any screen. Hardware calibration is more precise and holds better over time, but it needs a compatible professional monitor, so software is the practical choice for the majority.
How often should I re-calibrate?
Panels drift over time, so re-calibrating every few weeks to a couple of months keeps color accurate, more often for professional work. Keeping your lighting consistent between sessions also helps the profile stay valid, so treat calibration as ongoing maintenance.
See More:
- Best eyeshadow blender brush
- Best frozen foods for air fryer
- Best frozen food for air fryer
- Best way to reheat steak in air fryer
- Best air fryer recipes book
Final Thoughts on This Monitor Calibration Guide
The heart of any monitor calibration guide is targeting the right numbers, Delta E, gamut, white point and gamma, then measuring them with a colorimeter. Software calibration improves nearly any screen, while hardware calibration on a professional panel adds precision for print work. Control your lighting, re-calibrate regularly, and match the gamut to your output, and this monitor calibration guide will keep your color accurate and consistent for every project.